Floor Corker
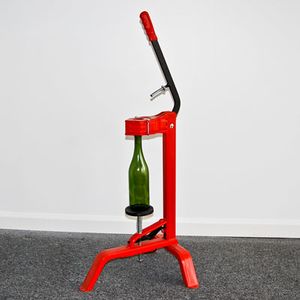
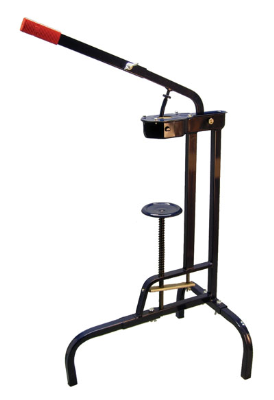
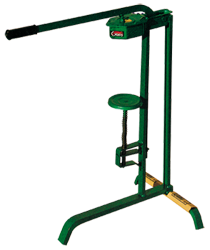
A Floor Corker is a device for corking bottles. It can be used for corking both Belgian bottle corks, and wine bottle corks. Other types of corkers exist, such as handheld corkers, but when corking a lot of bottles, a Floor Corker is recommended. See also Corking for more information on the corking process. See Packaging for general packaging information.
Recommended Floor Corkers
Homebrewers
Experienced Milk The Funk members recommend three Floor Corker brands [1].
- Portuguese Floor Corker (low end route) - Corking made easy. Single lever action with a plastic Iris that squeezes the cork and the adjustable depth plunger pops it right in to your desired depth. Works great even on the fat Belgian beer corks and is perfect for any standard wine corks or bottles. A small amount of assembly is required (it’s like one screw, no big deal) [2].
- Italian (Ferrari) Floor Corker (high end route) - The Italian Floor Corker is the Cadillac of corkers. This corker is very similar to the Portuguese corker, but with some upgrades. It is equipped with a brass iris compression fitting instead of plastic. A long handle gives you plenty of leverage and the corks go in effortlessly [3]. These floor corkers are not meant for commercial use, and many professional brewers have reported issues with the lower angled bar wearing out after 500-1200 bottles (see ref) [4]. Using a food safe lubricant has been reported to extend the life of this corker for commercial users [5].
- Grifo Corker Jaws - Recommended by Chris Stewart [6]
Commercial
- GW Kent rapid 12 Floor Corker ($995.00 - wine corks only, no champagne or Belgian corks).
- Champagne Corker Rapid 49 ($3800.00).
Usage and Tips
- See this comprehensive and instructional Blog Article by Dave Janssen.
- See this instructional video from Midwest Supplies.
- See this article by BYO, "Corking Belgians" by Dave Louw, July/August 2009.
- For more of the cork to stick out, a spacer (such as a drilled stopper) can be impaled onto the plunger of the corker to create more space [7].
- "I like to use a rubber stopper on the plunger to help gauge the depth I want to go. A no. 7 stopper fits perfectly and when you hit the lever to seat the cork, the stopper flexes to give enough resistance, not letting you drive the cork completely into the neck. Leaves about .5-.75" of the cork exposed almost automatically. Every time." - Tip from Jamie Daly on adjusting the depth of the cork [8]
- "When I started corking, I read somewhere to leave 5/8 inch out. I had terrible time removing the corks. Then someone said, half in - half out. I tried it to find out with that much cork out it had to be compressed by pushing down on the cork with the cage in place while twisting the wire. Although a little more trouble while caging, the payoff in ease of opening is worth it to me" - Tip from Mark Trent on Milk The Funk [9].
- "Yeah, I agree with Mark. It isn't much extra that needs to stick out to make the difference. And in order to make that work you have to vertically compress the top of the cork. I had been doing that with my hand (with nightmares of something happening similar to what Tarsicio went through) until my friend suggested using a bench capper for the cork compression part. That works quite well and the cork stays compressed enough to put the cage on without much vertical force on the top." - Follow up Tip from Dave Janssen on Milk The Funk [10].
- Raf Soef of Bokkereyder suggests using 26.5 mm cage hoods; champagne cages are too large for beer corks [11].
References
- ↑ Conversation on Milk The Funk. Input from Mark Fry, Jeff Porn, and Allen Stone. 3/27/2015.
- ↑ Rebel Brewer. Retrieved 3/27/2015.
- ↑ Midwest Supplies. Retrieved 3/27/2015.
- ↑ Discussion on MTF regarding Italian Floor Corkers wearing out. 11/28/2016.
- ↑ Private correspondence with Ehren Schmidt of Toolbox Brewing Co. by Dan Pixley. 1/5/2016.
- ↑ Conversation with Chris Stewart on Milk The funk. 03/27/2015.
- ↑ Conversation with Mark Fry on Milk The Funk. 3/27/2015.
- ↑ Conversation with Jamie Daly on Milk The Funk. 03/27/2015.
- ↑ Recommended conversation and tips about corks on MTF with Mark Trent. 03/27/2015.
- ↑ Conversation with Dave Janssen on Milk The Funk. 03/27/2015.
- ↑ Soef, Raf. Milk The Funk Facebook group. 03/27/2017.


